
In this post I will discuss how to frame and insulate the floor for the 12’ x 12’ Cabin. This post will go over the basic concepts you need to build a floor. If you want the exact dimensions for where every board is located, check out my cabin plans here.
We used a 2” x 8” board for the floor joist. I chose this size based on a joist span table that reflected the distance between my foundation skids and overhang off each end.
We used 3 ¼” 16D, or “16 penny” nails for the framing throughout the build—and 2 ¼” 8 D nails for the sheathing. Nails are used instead of screws due to a higher shear strength. We hammered our cabin together all by hand. You can use similar nails in a nail gun if you want. Our cabin is off-grid, and we didn’t have the resources at the time to purchase or use a nail gun.
In addition to regular nails, the floor joists are supported by joist hangers.
It is important to insulate the floor. We used 2 inch thick foam insulation, rated at R-13.1. We went with rigid foam insulation since it would be exposed under the structure. Rigid foam insulation is less prone to animal nesting than regular fiberglass insulation.
We sheathed the floor with 19/32” plywood. Once the structure is dried in, you can add whatever flooring you want or just use the plywood. The plywood is all we need for a floor in our cabin, we even painted it black.
With all this in mind, let’s jump in:

- Create a 12’ x 12’ square with the 4 outside boards and nail them together. Place the boards that run parallel with the floor joist inside the outer boards (See Picture below). It helps to have an extra set of hands.

2. Square the outside boards. Do this by measuring corner to corner. Since the frame is a square, these 2 dimensions should equal each other. For reference, the Pythagorean Theorem would tell us it should be around 200.64”. Adjust to achieve this equal dimension.


3. Layout the floor joist using 16” on center (OC). Do this by pulling your tape measure from one corner of the outside board. Use your pencil to mark every 16”. Then mark ¾” to the right and left of your 16” OC mark. These additional marks show exactly where the floor joists will go.

4. Nail in the floor joist based on the layout marks. Start from one side and work your way over. Use 3 nails per joist end.

5. As you add the floor joists, check the square by measuring the diagonal dimension.

6. Place joist hangers on each end of the joist using the associated nails.
Now you are ready to add insulation.
7. Measure the distance between your joist and rip your insulation boards according to this dimension. We did this on a table saw. You can just as easily snap a chalk line and cut the insulation with a circular saw. Note: the distance between the two end joists differs from the rest of the floor.

8. Use scrap wood to add supports at the appropriate height. Measure down the thickness of the insulation, then add around ⅛”. It is important that the insulation is not higher than the floor joists. We staggered these supports every few feet.

9. Add in your insulation.

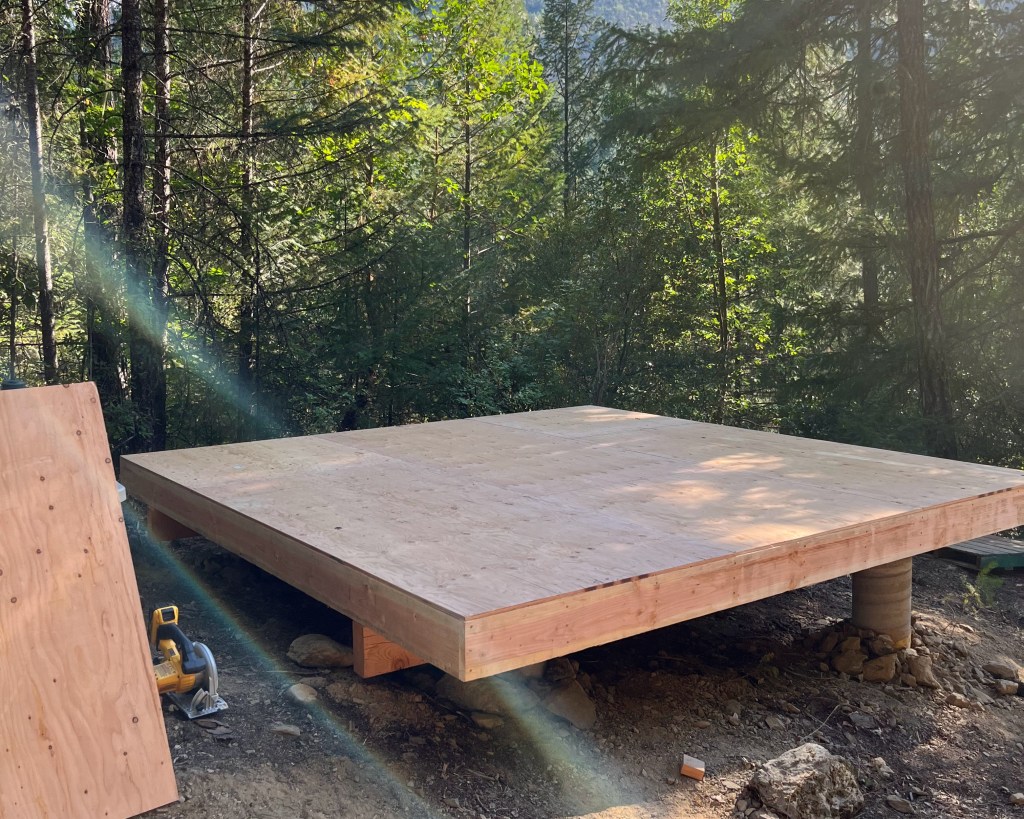
10. Sheathe the floor. Nail in plywood perpendicular to the floor joist with 8D nails. I placed nails every 12” through the sheathing and into the floor joist. I roughly measured the distance with two points on my farming hammer. Since plywood comes in 8’ lengths, there will be 3x 4’ square pieces to install. Stagger these on opposite ends so they are not all in the same place on the structure.

You now have a level floor to build the rest of the structure. Grab some camp chairs and sit on it for a while. Soak it in. It feels good.
Next week, I will discuss how to frame and raise the walls. Subscribe in the email box to never miss a post!
For free construction plans for the entire 12′ x 12′ cabin build click here. These are the plans I wish I had when I built this cabin. They have every dimension you need to build the cabin. With these plans, you can just focus on the building, with no head scratching or trying to calculate important dimensions.

Leave a comment