

In this post, I will go over how to frame the walls for the 12’x 12’ Cabin. Walls are built on the floor and then raised and sheathed. Each wall contains 1 bottom plate, a double top plate, and studs placed 16” on center in between. The top plates are designed to overlap and tie together the structure. Frame the walls that are on the outside corner first, then the inner corner walls. The outside corner walls have what are called ‘California corners’ that the other walls can nail into. Windows and doors are framed in and include a header that is at least two boards thick. Use the plan above as a reference as you read the article and build. If you want the full set of plans head over to my Free Downloads page.

- Pick the Wall you want to work on and screw in pieces of wood to use as a stop brace to assemble the wall. Place another set of stop braces on the opposite wall face.
- Place the bottom plate against these stop braces and mark layout lines where all your boards go. Follow the plan above to mark your layout lines accurately. You can alternatively follow the 16” OC method discussed in the floor framing article.
- Place your first top plate down and mark your layout lines. The marks on your top and bottom plates guide the rest of the wall. Take your time with this.

- Cut your wall studs to length, and place them in between your top and bottom plates.
- Place and lay out the framing for any window or doors on the wall. Refer to the framing plans above for exact dimensions.
- Starting on your top plate, nail everything together with 16D nails. Use 2 nails per stud. Use the braces you screwed in as a stop plate so you can hammer everything in.
- Nail in the second top plate on the outside corner walls. Leave room (3.5″) for the adjacent top plate to overlap.
- Push the wall to the stop plates on the opposite side and nail in your bottom plate.
- Push the wall back to its appropriate side.

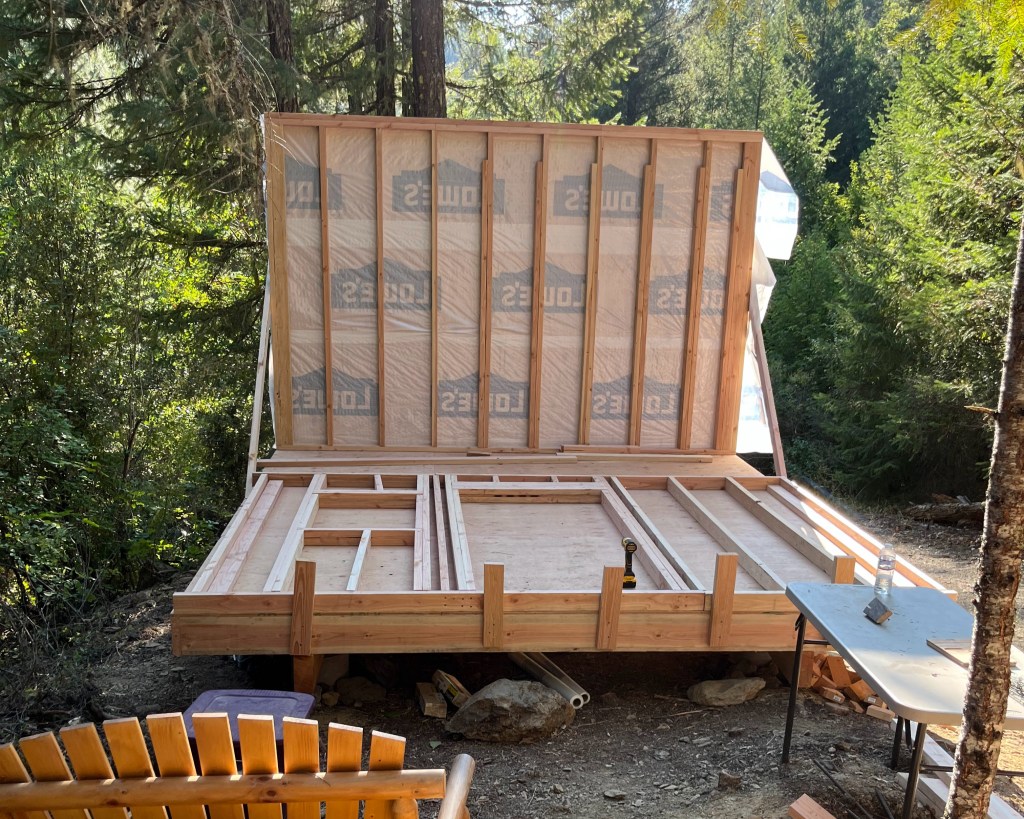
- Stand the wall up. It helps to have an extra set of hands (or two). Brace the wall with a 2” x 4” running diagonal between the wall face and the floor joist. Fasten the wall angled slightly out. You can use a level to get it past the plumb point. It is important to allow the walls on the inner corner to have room to fit.
- Nail your wall to the floor. Make sure it is flush with the braces.
- Staple on your vapor barrier.

13. Sheathe the wall. I designed the cabin so ¾” of the sheathing overlaps the floor sheathing. This helps prevent water from getting in. You can place a block on the bottom end of where the sheathing is supposed to go. Nail using 8D nails every 12”-16. (Note: the picture above demonstrates the blocking, not the sheathing overlap. I did not overlap my sheathing over the floor sheathing. It was a learning lesson that hopefully you will benefit from)

14. Now you can start framing and raising your other walls. As mentioned above, it is helpful to frame and raise the two walls that are on the outside, on the corners, then the remaining walls. On the 12’x 12’ cabin plans, you can follow the order the walls are in.
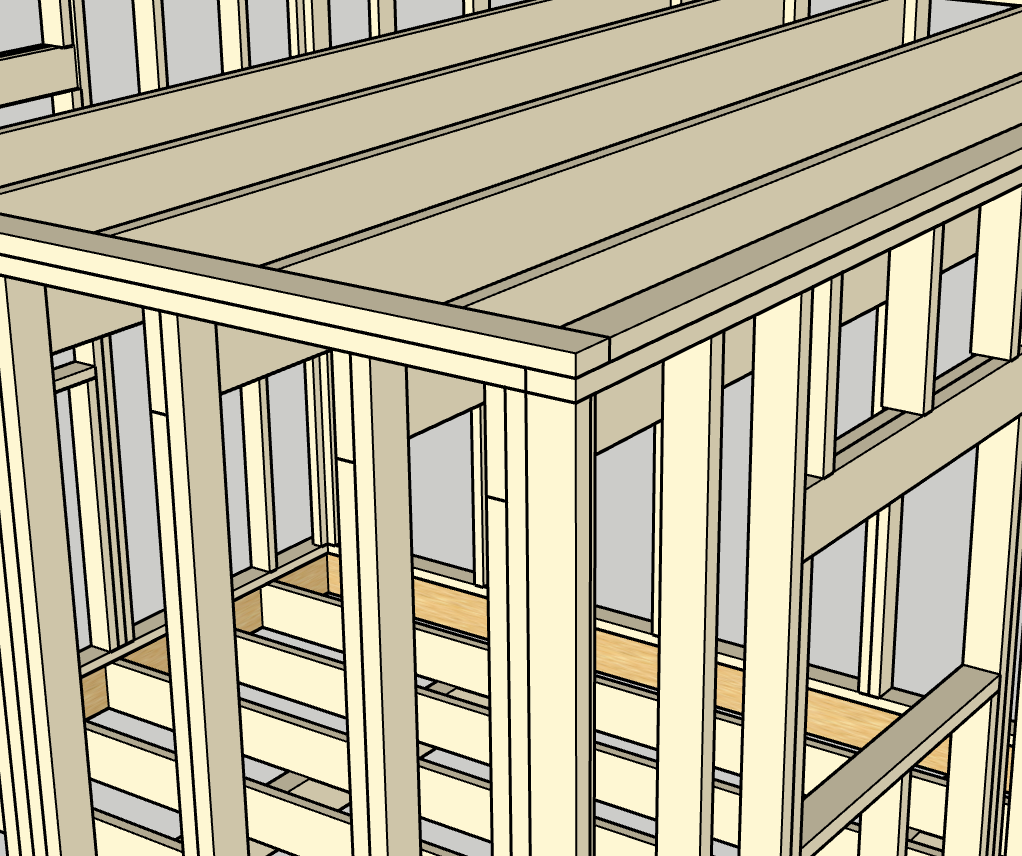
15. Once all the walls are raised, add the second top plate. This ties all the walls together
Your walls are now raised, sheathed, and ready for a roof. In this article I included one of the walls out of my full set of 12’ x 12’ Cabin plans. If you want the whole set for free so you never have to calculate a dimension, click here. These were the plans I wish I had when I started my cabin build. They are perfect for the amateur carpenter like myself.
Stay tuned. Next week I will go over roof framing. Subscribe to my email list to never miss a post.

Leave a comment